
How to Train YOLO v7 on a Custom Dataset for Gun Detection in Security Cameras (Python Tutorial 2023)
One of the unfortunate truths of the world is that thousands of people are shot to death each year.
Could we use the power of Artificial Intelligence to solve this problem?
In today’s article, we’ll explain how we at Theos AI successfully built a Computer Vision model that automatically monitors security cameras to detect guns.

“The world chico, and everything in it” — Tony Montana
This model could be used to notify the police immediately to make sure no one gets hurt, or to automatically close the entrance of a school or building to stop the attacker.
In our case, we will save a snapshot of the moment the gun was detected.
The Plan
First, let’s think how our gun detection system should work before we get started.
The user connects a security camera to the computer and starts our program.
Our program runs our AI model to detect guns every 2 seconds.
Then, each frame containing a gun will be saved in a local folder called "guns".
As we specified in the plan, our gun detection system will need to detect all the guns in the frames streamed from the security camera, and that can be done using a computer vision task called Object Detection.
Object detection models receive an image as input and return a list of detections as output, these detections are made up of the following information.
Class: the class name of the detected object, in our case it will be the “gun” class.
Confidence: this is an estimation of how confident our AI model is at making this prediction. Confidence scores range from 0 to 1, zero meaning no confidence at all, and one meaning absolute certainty.
X: the x position of the object within the image.
Y: the y position of the object within the image.
Width: the width of the object.
Height: the height of the object.
The best object detection model at the time of this writing is YOLOv7, so that’s the one we’ll use for our gun detection program.
In AI and Machine Learning, generally the larger the neural network (meaning it has many millions of artificial neurons), the better it performs. These models require quite a bit of computing power, therefore take longer to perform inference. We want our gun detection model to run as fast as possible, so we’ll use the smallest version of our chosen neural network: YOLOv7 tiny.
Let’s do it.
Following are the steps we’ll have to take to build our gun detection model.
Collect example images similar to the ones that our AI will see live in the real-world.
Label bounding boxes of all the objects of interest (guns) in all the example images.
Train the model.
Deploy the model.
Use this model in our gun detection program.
Collecting Images
We don’t need so many images to get a good working model, you should always start with just 100 images, train your AI and test it. We should take these images with the same camera (or set of cameras) that will be connected to our gun detection system.
If it’s not working very well, just upload again a few more hundred images, label them and retrain. Repeat this process until you’re satisfied with your model. Think of it like an AI MVP (minimum viable product).
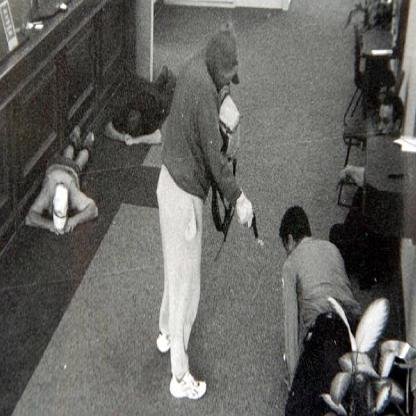
Here are some that I collected.


We should take images in various angles and light conditions if we plan to have multiple cameras on different locations.
Labeling
To tell our AI what we want it to detect, we need to draw bounding boxes in all our example images.
We’re going to use the Theos AI to label our images.
Following are the steps we have to take.
Sign up to a free Theos AI account.
Create a new project.
Create a new dataset.
Upload our images to our dataset.
Create the “gun” class we want to detect.
Start labeling our images.
Let’s go.
If you want to use the same dataset I used here, here’s the download link.
We’re now ready to train our AI model.
Training
In order to train our dataset with YOLOv7, we’ll need to follow these three simple steps.
Connect a Google Colab instance to Theos in order to use a free GPU for training.
Create a new training session with our desired neural network algorithm, in our case YOLOv7 tiny (the smallest YOLOv7 version), our dataset and the Google Colab machine that will do the training.
Click the Start Training button and wait for our AI to finish training.
Now, let’s create a new training session.
The training completed succesfully!
We’re now ready to deploy our model to the cloud as a REST API.
Deployment
To deploy our trained object detection model we’ll follow these steps.
Go to the deploy section of Theos.
Create a new deployment by selecting the algorithm we used, YOLOv7 tiny, and selecting the best weights (weights is a file that encodes the knowledge of our AI model).
Let’s create a new deployment and test it inside the Playground.
Our AI model is working!
Finally, it’s time to use it in our gun detection system.
Gun Detection System
This will be our Gun Detection System.

We’ll build it in Python for simplicity. Make sure to clone the Github Repo so you can follow along while we explain how the code works.
First, let’s import some dependencies.
Let’s copy the URL from our deployment and paste it here.
Now, let’s create a variable called seconds_to_wait to specify how many seconds we want to wait between each detection request. Then, we create the folder for saving the detected frames if it doesn’t exist. Finally, we start the camera capture and save the current time to later check if the seconds_to_wait has elapsed.
Here’s the rest of the code where we read new camera frames and check if the elapsed time reached our seconds_to_wait. When the specified time has elapsed, we call the detect function in our utils.py file by passing the frame image bytes and the deployment URL. Finally, we draw the detections on top of the frame and save it to our folder.
This is the detect function that will send the image to our AI and get back the detections. For more information on its parameters take a look at our Docs.
The End
We did it!
I hope you enjoyed reading this as much as we enjoyed making it!
If you found this cool or helpful please consider sharing it with a friend and smashing the star button for the Github algorithm, it will help us to know if you want us to make more of these!
Also, feel free to fork it and modify it to make it your own.
Consider joining our Discord Server where we can personally help you make your computer vision project successful!
Or you can also reach out to contact@theos.ai if you have any questions!